
PANASONIC ELECTRIC OVEN
Baking Workshop
Greater Flavours With Little Effort
With Panasonic Cooking

Greater Flavours With Little Effort With Panasonic Electric Oven

I'm delighted to be invited again by Panasonic Malaysia to participate in the Baking Workshop at 1 Utama Shopping Centre for bloggers and influencers in conjunction with the new Panasonic Electric Oven NB-H3800SSK recently.
Read My Cooking Workshop With Panasonic Cubie Oven: Click Here
Read More On Cooking Experience With Panasonic Cubie Oven: Click Here

Panasonic Latest Electric Oven Model NB-H3800SSK
Panasonic Cooking hosted the baking workshop with the tagline 'Greater Flavours With Little Effort' to celebrate the launch of this brand new Panasonic Electric Oven to showcase the amazing functions and ease-of-use of the oven.

Great Baking Experience With Panasonic Cooking Workshop

In conjunction with the release of the Panasonic Electric Oven NB-H3800SSK, my bloggers' friends and I were given the opportunity of the first-hand private baking experience with latest Panasonic electric oven to prepare and bake up mouth-watering desserts at the baking workshop.

With the tagline 'Greater Flavours With Little Effort', Panasonic had also come up with a 12-recipe e-book entitled 'Delightful Meals', aimed to motivate and kick-start users of the NB-H3800SSK who are totally new to roasting and baking.
Now, new users can try out the simple yet delicious recipes in the e-book in the comfort of their kitchen and eventually with the basics well-learnt, venture into developing new dishes for the family with homecooked meals with the versatile electric oven.

All Smiles With Our Gorgeous & Perfectly Baked Creations With Chef Collin Lim

😍 Selfies Time With Chef Collin Lim 😍
This time around, Panasonic Cooking engaged Chef Collin Lim at the baking workshop to guide the participants to baking two wonderfully simple but tasty recipes, namely the Salted Egg Yolk Cheesecake with Kellogg's Corn Flakes Crust and Unicorn Cupcakes using the NB-H3800SSK.


Panasonic Cooking At 1 Utama Shopping Centre

Happy Me Baking Together With My Fellow Friends
As a matter of fact, I was pretty nervous attending my first baking workshop out in the open right at a shopping mall ~ 1 Utama Shopping Centre. But nevertheless, with the presence and guidance of friendly chef Collin Lim, everyone was at ease and eager to learn how to bake and test out the two recipes using the new Panasonic electric oven.

Rich & Lucious Salted Egg Yolk Cheesecake with Kellogg's Corn Flakes & Dainty Cute Unicorn Cupcakes.
The unicorn cupcake is one of the recipes from the e-book while the salted egg yolk cheesecake contains Kellog's cornflakes crust. Salted Egg Yolk Cheesecake with Kellogg's Corn Flakes Crust was specially created to commemorate product partnership with Kellogg's Malaysia for this event. During the baking workshop, participants also get to use baking utensils sponsored by Chefology.
More On The Versatile Panasonic Electric Oven

Panasonic Electric Oven NB-H3800SSK
Panasonic has designed the NB-H3800SSK to be user-friendly so that the whole family can enjoy cooking together. Analog knobs simplify operations for the user, while the oven’s double insulated glass door keeps the high temperature internally and does not cause a burn if the door is accidentally touched. The oven is also portable, which makes it easier for set up at any countertop in the kitchen.
More Details On NB-H3800SSK: Panasonic Electric Oven NB-H3800SSK
More Details On NB-H3800SSK: Panasonic Electric Oven NB-H3800SSK

The Panasonic Electric Oven NB-H3800SSK functions to bake and roast, with separate upper and lower heat settings ranging from 70˚C to 230˚C, to enable more precise control over top and bottom heat. There is also an automatic Fermentation function that produces the optimum environment of warmth for products to be fermented.

Rotisserie Oven
The Rotary function enables poultry, whole fish and kebabs to be roasted on the rotisserie fork. The fat is drained to the bottom tray while the juice remains in the meat. The roast tends to cook and brown more evenly.

Conventional Cooking
The upper and lower heating tubes are thermostatically controlled for conventional baking and roasting without a fan, which is suitable for foods that require long cooking times. This setting is also suitable for cakes, casseroles and large cuts of meat.
Convection Cooking
A fan circulates heated air from the upper and lower tubes to quickly bring the whole oven to an even temperature. This setting reduces cooking time, saving energy and producing evenly cooked food. It enables baking on two levels, commonly used for pastries and biscuits.

Top or Bottom Heating
Separate controls for the upper and lower heating tubes enable more focused heat where it is required. Providing heat from the bottom of the oven only is suitable for pizza bases and pastry crusts that need more cooking at the bottom. Turning on the upper tubes only creates browning on the top of the food, which is useful for some tart fillings, finishing off a casserole and melting cheese toppings.

Fermentation
The fermentation of bread dough, yoghurt and other fermented foods is made easier with the help of this oven. The Fermentation function keeps the temperature at an optimum level for bread dough to proof evenly or for yoghurt to ferment. The oven enclosure also creates a draft-free environment so that items undergoing fermentation do not dry out.
More On The Panasonic Electric Oven Baking Workshop

Well, all dessert lovers .... come with me as I share with you the Step-By-Step Baking Instructions to conceptualise the whole baking process in my blog post here! 😍😍😍

Makes 4 Cheesecakes
Ingredients For The Cheesecake
- 250 g cream cheese
- 50 g sugar
- 8 g cornflour
- 3 egg yolks
- 55 g cream
- 1/8 tsp salt
- 2 salted egg yolks (fully cooked, use egg yolk only)
- 20 g butter
- 18 g icing sugar
- 13 g custard powder
- 5 g cornflour
- 9 ml evaporated milk
- 75 g Kellogg’s Corn Flakes
- 35 g melted butter
- Chicken Floss
Method
1. Preheat Panasonic Electric Oven to 180oC on upper and lower tubes.
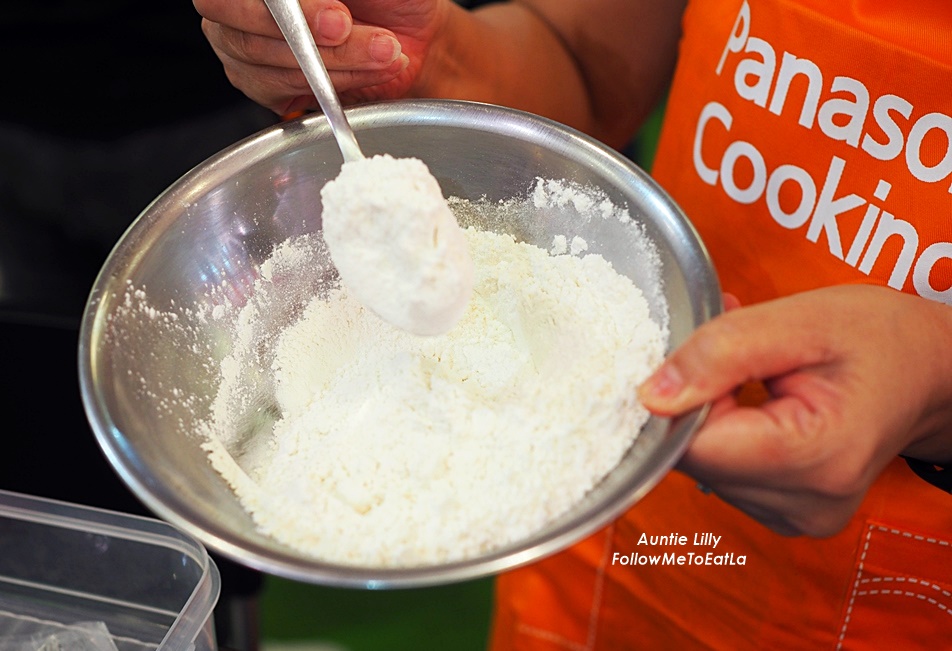
2. To make the base, grind Kellogg’s Corn Flakes into powder.
3. Combine cornflakes powder and melted butter; press onto bottom of ring moulds. Chill.
4. For the salted egg yolk filling, cream butter and sugar then add in salted egg yolk followed by the remaining ingredients and mix well.
5. Place mixture into a piping bag and pipe into small dollops and freeze overnight.
6. For the cheesecake, beat cream cheese, sugar and cornflour until light and fluffy.
7. Next add in egg yolks, cream and salt. Beat till all is well mixed.
8. Spoon some cheese mixture onto the crust then place a frozen salted egg yolk dollop into the middle.
9. Then cover with another layer of cheese mixture.
10. Bake the cheesecakes at180c for 20 minutes or until centre is almost set.
11. Once done remove from oven and let it set in fridge overnight.
12. Remove from moulds and top with chicken floss before serving.
Tips: Microwave the cheesecake for 20 seconds before serving to get the flowing lava effect.
Step-By-Step Baking Instructions
Salted Egg Yolk Cheesecake with Kellogg's Corn Flakes Crust

Preheat Panasonic Electric Oven to 180 C on upper and lower tubes.

To make the base, grind Kellogg’s Corn Flakes into powder.


Combine cornflakes powder and melted butter; press onto bottom of ring moulds. Chill.

For the salted egg yolk filling, cream butter and sugar then add in salted egg yolk followed by remaining ingredients and mix well. Place mixture into a piping bag and pipe into small dollops and freeze overnight.

For the cheesecake, beat cream cheese, sugar and cornflour until light and fluffy. Next add in egg yolks, cream and salt. Beat till all is well mixed.


Spoon some cheese mixture onto the crust then place a frozen salted egg yolk dollop into the middle.

Then cover with another layer of cheese mixture.

Bake the cheesecakes at 180°C for 20 minutes or until centre is almost set.

Once done remove from oven and let it set in fridge overnight.

Baked To Perfection Salted Egg Yolk Cheesecake with Kellogg's Corn Flakes Crust

Remove from moulds and top with chicken floss before serving. Enjoy your labour of love with a cup of nice hot tea!


More Deliciously Gooey Cheesecake Photos To Tempt Your Senses
Check Out This Video Of My Super Yummy-Licious Flowy Lava Effect Of The Salted Egg Yolk Cheesecake

Moving on next, with great success in the baking of the Salted Egg Yolk Cheesecake with help from Chef Collin Lim, I was in sync and all ready to bake the next dessert of the cute-looking Unicorn Cupcakes.

Makes 7 cupcakes
Ingredients For The Vanilla Cupcakes
Ingredients For The Decoration
Method
1. Preheat Panasonic Electric Oven to 180oC on upper and lower tubes.
2. In a bowl, sieve together flour and baking powder.
3. In a separate bowl, cream the butter and sugar until white and fluffy.
4. Add eggs one at a time, creaming well in between each addition. Stir in vanilla essence.
5. Fold in flour mixture. Stir in milk. Be careful not to overmix.
6. Fill cupcake cups to about 2/3 full and place them onto the baking tray.
7. Bake for 20 – 25 minutes or until cooked. Cool.
8. Decorate with fondant and buttercream – Make horns (push a toothpick halfway into each horn) and ears out of fondant and dust with gold dust, then leave to dry.
9. Cover the cupcakes with rounds of rolled fondant. Attach the horns to the cupcakes.
10. Pipe buttercream stars around the horns and attaches the ears. Finish off by with drawing the eyes.


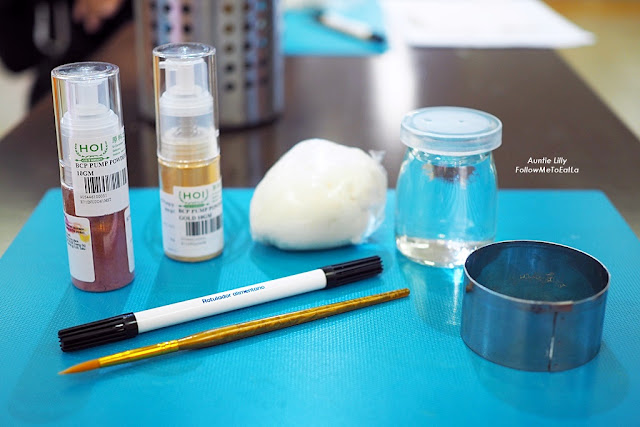 Edible Gold dust, Brush, Marking Pen, Round Mould, Fondant


Check Out My Pretty & Cute Dainty Unicorn Cupcakes


Ingredients For The Vanilla Cupcakes
- 110 g plain flour
- 1½ tsp baking powder
- 125 g butter
- 100 g castor sugar
- 2 eggs
- ½ tsp vanilla essence
- 2 tbsp milk
Ingredients For The Decoration
- White fondant
- Buttercream in various pastel colours
- Edible gold dust
- Black edible marker
Method
1. Preheat Panasonic Electric Oven to 180oC on upper and lower tubes.
2. In a bowl, sieve together flour and baking powder.
3. In a separate bowl, cream the butter and sugar until white and fluffy.
4. Add eggs one at a time, creaming well in between each addition. Stir in vanilla essence.
5. Fold in flour mixture. Stir in milk. Be careful not to overmix.
6. Fill cupcake cups to about 2/3 full and place them onto the baking tray.
7. Bake for 20 – 25 minutes or until cooked. Cool.
8. Decorate with fondant and buttercream – Make horns (push a toothpick halfway into each horn) and ears out of fondant and dust with gold dust, then leave to dry.
9. Cover the cupcakes with rounds of rolled fondant. Attach the horns to the cupcakes.
10. Pipe buttercream stars around the horns and attaches the ears. Finish off by with drawing the eyes.
Step-By-Step Baking Instructions
Unicorn Cupcakes
Preheat Panasonic Electric Oven to 180oC on upper and lower tubes. In a bowl, sieve together flour and baking powder.
In a separate bowl, cream the butter and sugar until white and fluffy. Add eggs one at a time, creaming well in between each addition. Stir in vanilla essence.
Fold in flour mixture. Stir in milk. Be careful not to overmix.

Fill cupcake cups to about 2/3 full and place them onto the baking tray.

Bake for 20 – 25 minutes or until cooked. Cool.
Decorate with fondant and buttercream – Make horns (push a toothpick halfway into each horn) & ears out of fondant.

Dust the horns with gold dust, then leave to dry.
Cover the cupcakes with rounds of rolled fondant. Attach the horns to the cupcakes.
Pipe buttercream stars around the horns and attaches the ears.

Finish off drawing of the eyes & lips if you like with this special marking pen with food colourings!

Finish off drawing of the eyes & lips if you like with this special marking pen with food colourings!
Watch Me As I Piped The Buttercream Stars. Enjoying Every Minutes Of It!

Check Out My Pretty & Cute Dainty Unicorn Cupcakes

Well, here's my Unicorn Cupcakes, freshly baked from Panasonic Electric Oven NB-H3800SSK. I have to say that these lovely and ornamental pretty Unicorn Cupcakes are seriously too pretty to be eaten.
My Memorable Day Baking With Famous Mummy Blogger, Kak Ruby

Overall, I had a great baking experience with everyone at Panasonic Cooking Workshop. Chef Collin Lim was always on hand to guide and shares handy baking tips with us ~ the earnest 'chef-of-the-day' to preparing these two amazing recipes for the day. Truly a fun baking day for me!


I'm impressed with the Panasonic Electric Oven, an exquisitely designed oven to suit all the cooking needs that comes with a large capacity of 38L and high powered at 1800W. Can't wait to try out all the cooking functions with its multi-zone temperature control so I can roast, grill, bake and even ferment at different heating temperature for different food to achieve optimum cooking results, all in one convenient appliance!

Proud Certified Bakers Of The Day Posing With Our Unicorn Cupcakes Masterpiece

Thanks to Panasonic Malaysia for having me over for such a memorable and amazing baking experience with their new electric oven with special appreciation to Kellogg's Malaysia and Chefology for their lovely gifts. I shall be sharing more about my cooking experience using Panasonic Electric Oven NB-H3800SSK incorporating my home-style hearty family favourite recipes on the blog soon. So, stay tuned to my blog!
Watch This Candid Video As We Pose For The Videographer That Day
Panasonic has set the trend for kitchen appliances to accommodate urban and young families. Panasonic Cooking promotes a healthier cooking lifestyle in the midst of busy and fast-paced lives. To find out more about Panasonic Electric Oven NB-H3800SSK and related info such as video recipes, cooking tips and event details, visit cooking.my.panasonic.com
For more information about Recipes at Panasonic Cooking Workshop, please visit Panasonic Malaysia Facebook and The Cooking House Facebook and Website
For more information about Recipes at Panasonic Cooking Workshop, please visit Panasonic Malaysia Facebook and The Cooking House Facebook and Website
Website www.panasonic.com/my
Facebook www.facebook.com/mypanasonic
Follow Me At My FaceBook Page For My Latest Reviews
Follow Me To Eat on Instagram
Thanks to Panasonic Malaysia for having me over for such a memorable and amazing baking experience with their new electric oven with special appreciation to Kellogg's Malaysia and Chefology for their lovely gifts. I shall be sharing more about my cooking experience using Panasonic Electric Oven NB-H3800SSK incorporating my home-style hearty family favourite recipes on the blog soon. So, stay tuned to my blog!
ReplyDeleteHi, I just bought this Panasonic oven, but I seem to be having problems. Just a question- are the heating tubes supposed to glow bright red when it is heated up. The one i have dont seem to have glowing red tubes when it is heated up. Lol, the dealer already changed one unit for me, and I am at my wits end looking for someone who have experience using this oven. Tks
ReplyDeleteGreat article.
ReplyDelete